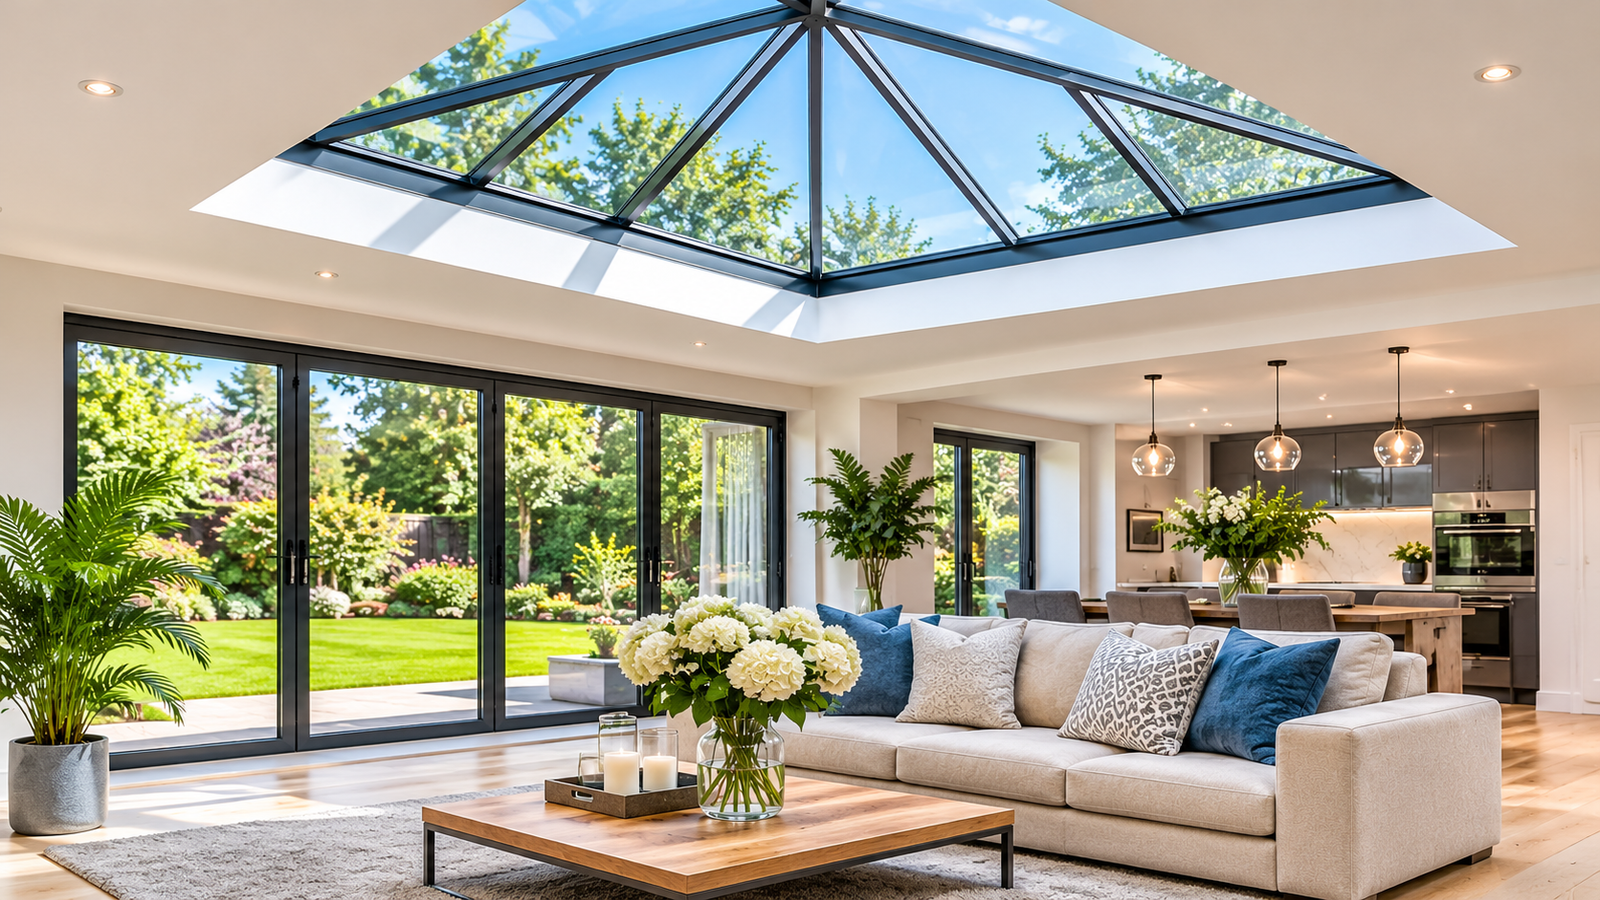
Natural light can change the atmosphere of an interior, making rooms feel more spacious, welcoming and comfortable. However, properties with limited windows or enclosed extensions often struggle to receive enough daylight. A roof glazing feature offers a practical way to address this problem. A glass roof lantern is particularly suitable for kitchens, dining areas, living rooms and conservatories, where overhead glazing can bring daylight into the centre of a room while adding an attractive architectural feature. Understanding its design, materials, installation requirements and maintenance needs can help homeowners make a more informed decision.
What Makes a Roof Lantern Different from Standard Roof Glazing?
A roof lantern is a raised glazed structure fitted into a flat or low-pitched roof. Unlike a standard rooflight, which generally sits close to the roof surface, a lantern has an elevated framework that creates additional height and a more distinctive appearance.
Its angled glass panels allow daylight to enter from different directions throughout the day. This can help illuminate areas that receive little natural light through conventional windows.
Roof lanterns are commonly installed in:
- Kitchen extensions and open-plan cooking areas
- Dining rooms with limited external windows
- Single-storey home extensions
- Conservatories and garden rooms
- Living spaces beneath flat roofs
- Commercial buildings requiring additional daylight
The raised design also creates a visual focal point. Its shape can complement both traditional properties and contemporary architectural styles.
How Natural Light Improves Indoor Spaces
Natural daylight affects how people experience an interior. A room with adequate daylight can feel more open and inviting, particularly when the glazing is positioned above a central living area.
A roof lantern helps distribute sunlight across a wider section of the room than a small vertical window might manage. Its sloping glass surfaces capture daylight at different angles, depending on the position of the sun.
There are several practical advantages:
A brighter interior: Overhead glazing introduces daylight into areas that may remain shaded throughout much of the day.
A greater sense of space: The elevated structure draws the eye upwards, creating an impression of additional height.
Better visual connection with the outdoors: Occupants can enjoy views of the sky and changing weather without leaving the room.
Reduced daytime lighting requirements: In suitable conditions, natural illumination may reduce the need to use artificial lights during daylight hours.
The actual amount of light depends on the lantern’s dimensions, glass specification, roof orientation, surrounding buildings and local climate.
Choosing the Right Glass and Frame Materials
The materials used in a roof lantern affect its appearance, insulation, durability and maintenance requirements. Homeowners should consider both the glazing and the supporting frame before making a purchase.
Double or Triple Glazing
Double-glazed units are a common choice for residential roof lanterns. They contain two glass panes separated by an insulating cavity, helping limit heat transfer between the interior and exterior.
Triple glazing uses three panes and can provide additional thermal insulation. However, it may increase the overall weight and cost of the installation. Its suitability depends on the building’s structural capacity and energy requirements.
Low-E Glass
Low-emissivity glass has a special coating that helps reduce heat transfer. Depending on its specification, it can help retain indoor warmth during colder months while limiting unwanted solar heat gain.
Solar-control glazing may also be useful for rooms exposed to strong sunlight. It can reduce excessive heat entering the property, although the level of solar protection should be balanced against the amount of daylight desired.
Aluminium Frames
Aluminium is widely used because it combines strength with relatively slim profiles. This allows manufacturers to create structures with larger glazed sections and less visible framing.
Aluminium frames are generally low-maintenance and can be finished in different colours to complement the property’s exterior.
Timber and Other Frame Options
Timber offers a traditional appearance and may suit properties with established architectural features. However, it generally requires more regular maintenance than aluminium.
Some manufacturers also offer composite systems that combine different materials to balance appearance, insulation and durability.
Important Design Features to Consider Before Buying
The appearance of a roof lantern matters, but its technical specifications determine how well it performs after installation.
Before choosing a model, examine the following features.
1. Dimensions and proportions
The lantern should be appropriately sized for the room and roof opening. A structure that is too small may provide limited daylight, while an oversized design could affect the building’s appearance and structural requirements.
2. Roof pitch and shape
Roof lanterns are available in different configurations, including square and rectangular designs. Check the manufacturer’s recommended roof pitch and installation requirements before selecting a model.
3. Thermal performance
Look for documented U-values for the complete glazing system rather than considering the glass alone. A lower U-value generally indicates better insulation.
4. Weather resistance
The framework, seals and flashing must prevent water from entering the building. Ask about tested weather performance and the manufacturer’s installation guidance.
5. Ventilation options
Some designs include opening sections that allow warm air to escape. This can be particularly useful in kitchens and dining areas where heat and moisture may accumulate.
6. Safety glass
Roof glazing should use suitable safety glass in accordance with applicable building regulations. Laminated or toughened glass may be required depending on its location, size and installation details.
Finding Suitable Roof Lanterns Online
Comparing different manufacturers and specifications can make the buying process easier. Browsing roof lanterns online gives homeowners an opportunity to examine available dimensions, frame finishes, glazing options and technical information before contacting a supplier.
However, photographs alone cannot establish whether a particular product will suit a property. Buyers should check product specifications carefully and request clarification about any missing information.
Useful details to compare include:
- Overall external dimensions and internal structural openings
- Frame material and available finishes
- Glass thickness and glazing configuration
- Thermal insulation ratings
- Solar-control options
- Opening mechanisms and ventilation features
- Warranty coverage and replacement component availability
It is also worth checking whether the quoted price includes the complete framework, glazing bars, seals, fixings and installation accessories. Some products are supplied as complete kits, while others require additional components.
A supplier should be able to explain exactly what is included and identify any items that need to be purchased separately.
What to Check When Comparing Roof Lanterns for Sale
A lower purchase price does not always represent better value. The overall cost depends on product quality, installation requirements, glazing specifications and long-term maintenance.
When reviewing roof lanterns for sale, compare products on the basis of their technical performance rather than appearance alone.
Check the warranty period and determine whether it covers the frame, glass units, seals and hardware separately. Ask about the availability of replacement glazing if a panel becomes damaged in the future.
Buyers should also establish whether the manufacturer provides installation instructions and technical support. This information is particularly useful when the roof structure has unusual dimensions or requires additional reinforcement.
For larger installations, requesting a written quotation can help prevent unexpected costs. The quotation should identify the product specification, delivery arrangements, installation work and any additional building alterations.
Preparing the Roof for Installation
A roof lantern requires a suitable supporting structure. Before installation begins, the existing roof should be assessed to establish whether it can accommodate the additional weight and altered load distribution.
A professional installer or structural engineer may need to examine the roof joists, supporting beams and surrounding construction.
The preparation process generally involves:
- Measuring the proposed opening accurately.
- Checking the structural condition of the existing roof.
- Installing suitable support members around the opening.
- Preparing the roof upstand to the manufacturer’s specifications.
- Checking drainage arrangements and waterproofing details.
- Fitting the lantern and securing its components.
- Inspecting seals, joints and drainage paths.
Poor installation can lead to water leaks, condensation and heat loss. Correct positioning, suitable flashing and careful sealing are therefore essential.
Building regulations and planning requirements should also be checked before work starts. Requirements vary according to the property, location and nature of the proposed alteration.
Maintenance That Helps Preserve Performance
Roof lanterns generally require straightforward maintenance, but regular inspections can help identify problems before they become expensive repairs.
Clean the external glass periodically using suitable glass-cleaning products and a soft cloth or sponge. Avoid abrasive materials that could damage coatings or scratch the surface.
Inspect the frame and seals for visible deterioration. Pay particular attention to joints, drainage channels and areas where water could collect.
Additional maintenance checks include:
- Removing leaves and debris from nearby roof drainage points.
- Checking opening mechanisms for smooth operation.
- Looking for signs of moisture around the internal frame.
- Inspecting seals for cracks or displacement.
- Arranging professional repairs if glazing units become damaged.
Persistent condensation between the panes may indicate a failed insulated glass unit and should be assessed by a glazing professional.
Making a Practical Choice for Your Property
A well-selected roof lantern can improve daylight levels, add architectural interest and make an extension feel more open. Its performance depends on more than the design itself. Glazing quality, frame materials, thermal specifications, roof preparation and installation standards all influence the final result.
Homeowners should compare complete product specifications, confirm structural suitability and understand the installation costs before placing an order. Taking time to assess these details helps ensure that the finished roof glazing meets the property’s practical requirements while complementing its overall appearance.